Rolled Paper Beaded Necklace:
*recycled glossy mailings and magazines, scissors, Elmer's glue, straws and/or shishkabob sticks, string, pony beads
Each bead starts off as an isosceles triangle, cut from junk mail or old magazines. The longer the triangle, the thicker the bead. The wider the base of the triangle, the longer the bead. A little glue and a little patience is then all it takes to form a lovely, biconal bead. Space paper beads with 1 or 2 pony beads and string into a necklace. A beautiful, recycled piece of art is formed!

Inspiration: Women in Uganda make these exact types of beads and beaded jewelry. The only difference is they seal the beads to make them waterproof and they make hundreds of beads. The sales of these necklaces help the women and their families have a better life. Many women invest the money they earn and start their own businesses, in many fields, after their 18-month training with BeadforLife. Check out the necklaces at beadforlife.org This is a great project for kids and adults with a wonderful community and global connection.
**2022 update: Bead for Life retail store is now closed but the mission continues with Street Business School. What is Street Business School?
_______________________________________________


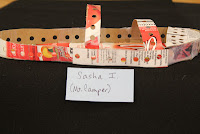


Cereal box Shoes
*empty cereal boxes, scissors, pencils, tape
Cut open empty cereal box and trace both feet. Cut out tracing. Cut and attach any number and widths of straps. Tape straps to base of foot. Best for indoor use.
Note: this lesson was done at 2011 camp.
Alternative: create a wallet out of cardboard
-------------------------------------------------------------------------------------------


Toilet Paper Tube Dolls (Soft Sculpture)
*1 toilet paper tube/child, 5"x14" muslin fabric, thin rubber bands, batting (small ball per child), markers, glue, scissors, other craft supplies to decorate (buttons, scrap fabric, pipe cleaners, yarn) - note: felt is very easy for kids to cut
Inspiration: Faith Ringgold (American Artist, born 1930). Ringgold’s family was very artistic. Her mother was a fashion designer and dressmaker. Her grandmother learned how to quilt from her great-great grandmother and passed this tradition down. Ringgold took these family traditions and created "story quilts" (see books like "Tar Beach") and sculptures that were soft. Sculptures are 3-dimensional, not 2-D or flat. The book Talking to Faith Ringgold is very inspirational.

"Street Business School is a world-class entrepreneurial training program that builds women’s confidence and provides business skills, so they can launch micro-businesses and lift their families from deep poverty." (source: https://www.beadforlife.org/)
_______________________________________________


Cereal box Shoes
*empty cereal boxes, scissors, pencils, tape
Cut open empty cereal box and trace both feet. Cut out tracing. Cut and attach any number and widths of straps. Tape straps to base of foot. Best for indoor use.
Note: this lesson was done at 2011 camp.
Alternative: create a wallet out of cardboard
-------------------------------------------------------------------------------------------


Toilet Paper Tube Dolls (Soft Sculpture)
*1 toilet paper tube/child, 5"x14" muslin fabric, thin rubber bands, batting (small ball per child), markers, glue, scissors, other craft supplies to decorate (buttons, scrap fabric, pipe cleaners, yarn) - note: felt is very easy for kids to cut
Inspiration: Faith Ringgold (American Artist, born 1930). Ringgold’s family was very artistic. Her mother was a fashion designer and dressmaker. Her grandmother learned how to quilt from her great-great grandmother and passed this tradition down. Ringgold took these family traditions and created "story quilts" (see books like "Tar Beach") and sculptures that were soft. Sculptures are 3-dimensional, not 2-D or flat. The book Talking to Faith Ringgold is very inspirational.

*Step 1 – take batting (used inside quilts) and put into top
of tube (to shape the head)
*Step 2- place fabric over tube
*Step 3- place rubber band around doll’s head (I show them how to do this step by step- place over head, not tight enough, twist, OPEN, place over head one more time)
*Step 4- smooth the fabric and “fluff” the head if you need to (take a marker and push up from inside, pull up on fabric & batting too)
*Step 5- write name on bottom/outside of tube with with markers
*Step 6- color doll (face, clothes) and add other craft supplies (buttons as eyes or a pendent on necklace, yarn for hair/make a pom-pon, pipe cleaners as arms). Note- I tucked the fabric and pipe cleaner under the rubber bands, no need to glue.
*Step 2- place fabric over tube
*Step 3- place rubber band around doll’s head (I show them how to do this step by step- place over head, not tight enough, twist, OPEN, place over head one more time)
*Step 4- smooth the fabric and “fluff” the head if you need to (take a marker and push up from inside, pull up on fabric & batting too)
*Step 5- write name on bottom/outside of tube with with markers
*Step 6- color doll (face, clothes) and add other craft supplies (buttons as eyes or a pendent on necklace, yarn for hair/make a pom-pon, pipe cleaners as arms). Note- I tucked the fabric and pipe cleaner under the rubber bands, no need to glue.