Showing posts with label Sculptures. Show all posts

Friday, May 25, 2012

Week 11- Go Green!


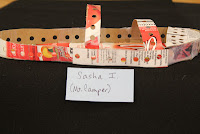
Rolled Paper Beaded Necklace:
*recycled glossy mailings and magazines, scissors, Elmer's glue, straws and/or shishkabob sticks, string, pony beads
Each bead starts off as an isosceles triangle, cut from junk mail or old magazines. The longer the triangle, the thicker the bead. The wider the base of the triangle, the longer the bead. A little glue and a little patience is then all it takes to form a lovely, biconal bead. Space paper beads with 1 or 2 pony beads and string into a necklace. A beautiful, recycled piece of art is formed!

Inspiration: Women in Uganda make these exact types of beads and beaded jewelry. The only difference is they seal the beads to make them waterproof and they make hundreds of beads. The sales of these necklaces help the women and their families have a better life. Many women invest the money they earn and start their own businesses, in many fields, after their 18-month training with BeadforLife. Check out the necklaces at beadforlife.org This is a great project for kids and adults with a wonderful community and global connection.  

**2022 update: Bead for Life retail store is now closed but the mission continues with Street Business School. What is Street Business School? 
"Street Business School is a world-class entrepreneurial training program that builds women’s confidence and provides business skills, so they can launch micro-businesses and lift their families from deep poverty." (source: https://www.beadforlife.org/)


_______________________________________________


Cereal box Shoes
*empty cereal boxes, scissors, pencils, tape
Cut open empty cereal box and trace both feet. Cut out tracing. Cut and attach any number and widths of straps. Tape straps to base of foot. Best for indoor use.
Note: this lesson was done at 2011 camp.
Alternative: create a wallet out of cardboard

-------------------------------------------------------------------------------------------


Toilet Paper Tube Dolls (Soft Sculpture)
*1 toilet paper tube/child, 5"x14" muslin fabric, thin rubber bands, batting (small ball per child), markers, glue, scissors, other craft supplies to decorate (buttons, scrap fabric, pipe cleaners, yarn) - note: felt is very easy for kids to cut
Inspiration: Faith Ringgold (American Artist, born 1930). Ringgold’s family was very artistic. Her mother was a fashion designer and dressmaker. Her grandmother learned how to quilt from her great-great grandmother and passed this tradition down. Ringgold took these family traditions and created "story quilts" (see books like "Tar Beach") and sculptures that were soft. Sculptures are 3-dimensional, not 2-D or flat. The book Talking to Faith Ringgold is very inspirational.

*Step 1 – take batting (used inside quilts) and put into top of tube (to shape the head) 
*Step 2- place fabric over tube
*Step 3- place rubber band around doll’s head (I show them how to do this step by step- place over head, not tight enough, twist, OPEN, place over head one more time)
*Step 4- smooth the fabric and “fluff” the head if you need to (take a marker and push up from inside, pull up on fabric & batting too)
*Step 5- write name on bottom/outside of tube with with markers
*Step 6- color doll (face, clothes) and add other craft supplies (buttons as eyes or a pendent on necklace, yarn for hair/make a pom-pon, pipe cleaners as arms). Note- I tucked the fabric and pipe cleaner under the rubber bands, no need to glue.

Week 9- Celebrate SF!


Aerial Perspective/ Skyscraper Drawing (courtesy of Silicon Valley Art Museum)
*pencils, paper, markers
Read Above San Francisco by Nina Gruener & Robert Cameron for inspiration. Children draw 7-9 parallelograms. The parallelograms will become the rooftops of buildings. They then draw vertical lines down from 3 corners of each roof. They can add details like windows, rooftop gardens, the Golden Gate Bridge, etc. Complete by outlining in marker.


Golden Gate Bridge Painting
*cardboard (3"-5" in length & about 1" wide), red paint, paper plates/palettes, 9x12 paper (white or light blue)
Discuss the history of the Golden Gate Bridge (took 4 years to build, completed in 1937, at the time was the longest suspension bridge, connects SF to Marin County). Vocabulary= towers (2), deck (roadway), 4 rectangles cut out of towers above deck, "X" below the deck on tower, diagonal and vertical lines in deck, curved cables, suspenders hang down from curved cables.
~Note: example of cardboard/painting tool is shown in last photograph.
~Examples are from Kindergartners & 3rd graders
Step by step directions:
1. paint 2 towers (no designs) - note each tower can be the same height or one can be shorter to show perspective
2. Paint deck with 2 horizontal lines
3. Add details such as rectangles in upper towers, "X"s on lower towers, lines in deck
4. Place a dot on left corner of each tower (this part lights up at night). Connect with a "U" shaped line by dragging cardboard. Stop in the middle to reposition cardboard. Make dots in right hand corners and connect with another "U".
5. Don't forget to draw cables going off the page from each corner of tower (in opposite direction of the last one)
6. Paint a few suspenders.
7. Add any other details you feel necessary.


3D Paper Sculpture
(inspiration from the slides of SF, curvy Lombard St., & Golden Gate Bridge)
*colored construction paper 9"x12", scissors, scotch tape

Activity 1 (directly above): Provide or have kids cut 1.5"-2" wide strips of paper (of various lengths). Fold strip of paper lengthwise and then make cuts on only one half of the paper, about 1" apart. Fold each "fringed" piece in opposite directions. Arrange and tape strips of paper onto background paper.


Activity 2 (directly above): Kids make 2 sets of parallel cuts on two different sides of the background paper. They then cut (or teacher can provide strips already cut) colored paper into strips about an inch wide (and about 12" long). The strips of paper are arranged on the background paper, starting by sliding the first two strips under the cuts. The strips can twist and turn, be accordion folded, etc. They are taped down and a whimsical relief sculpture is created. This is a great lesson for kindergartners - 2nd grade.

Monday, May 21, 2012

Week 4- Gold Rush


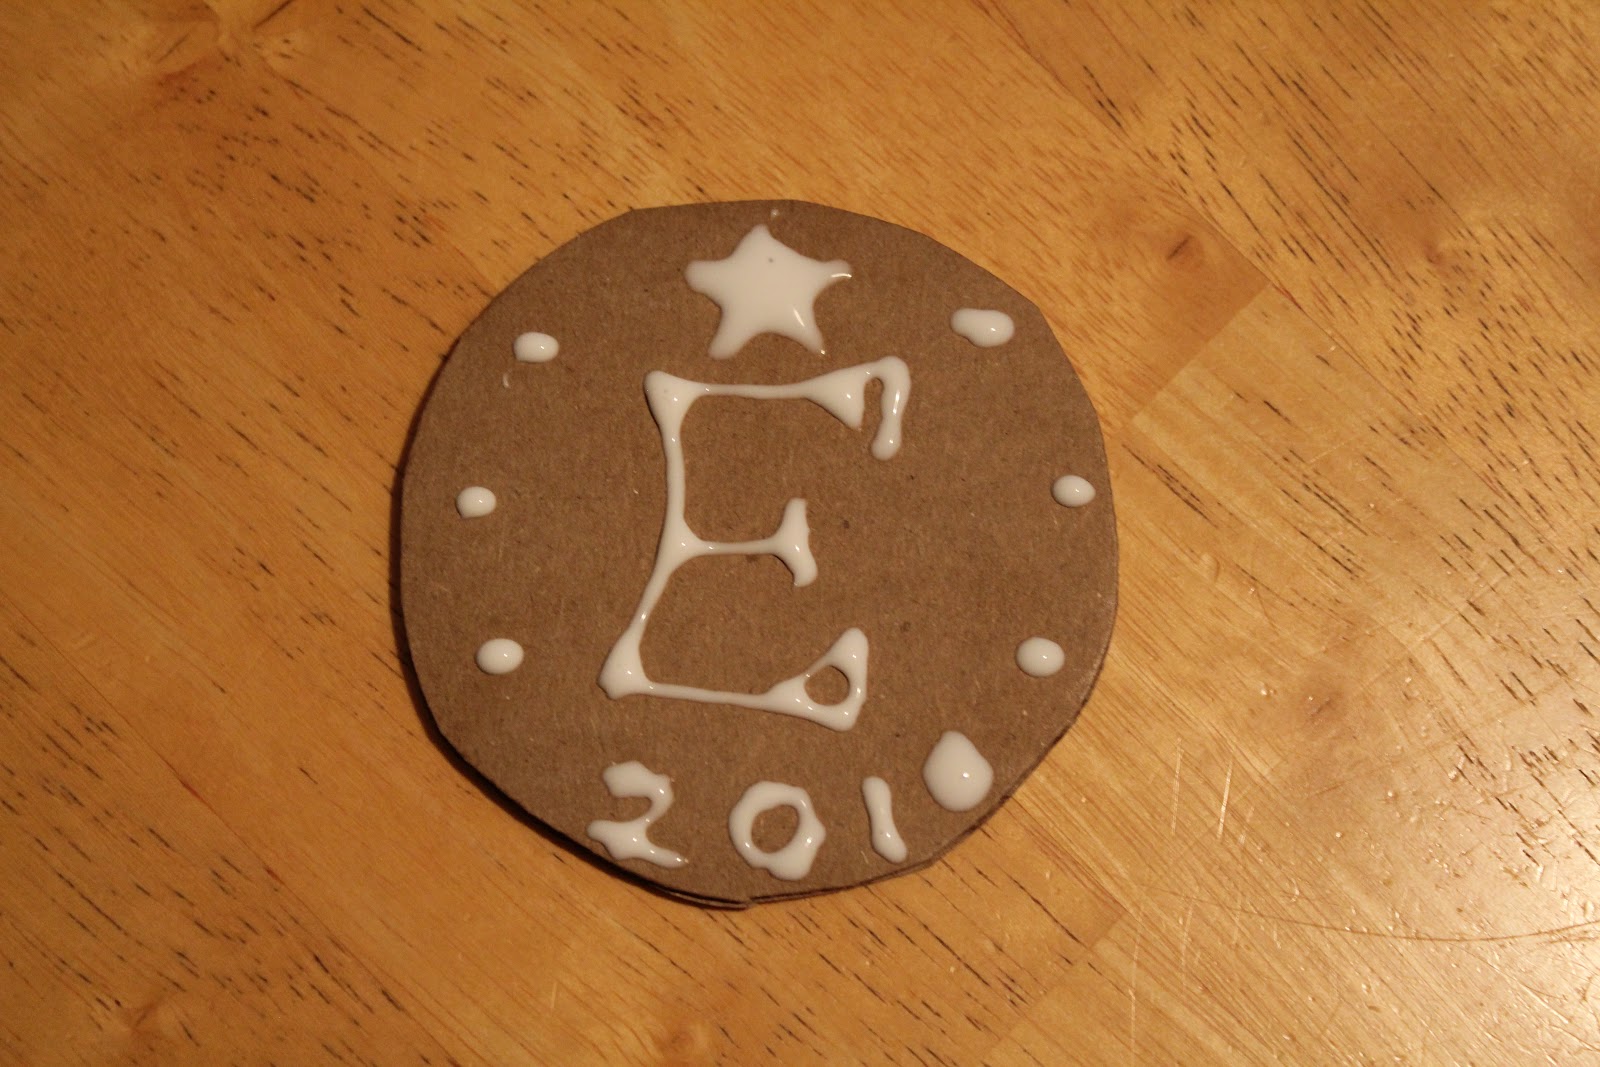
Gold Coin
*cardboard  circles (pre cut for younger kids), glue and/or string, tempera or acrylic gold paint, optional: gold glitter
Each kid designs their coin with glue or with string glued onto cardboard. The next day, after the glue dries, the kids paint the coins gold. Note that acrylic paint can stain :( but dries quickly :) so you could actually paint both sides in one session with the acrylic paint.


Clay coins or Shrinky Dink Coins
*Crayola air dry clay, clay mats, little dishes of water, shishkabob sticks, gold tempera paint

If the clay gargoyles went well, you could make gold coins out of clay instead of cardboard. Or buy some gold permanent markers and create some gold shrinky dink art. Always a camp favorite!

Note: See cutting tips above. I like to use a metal wire cutter. Cut Crayola brand into 2 discs. Then use 1/16 of one of the discs. That will yield 32 pieces of clay from each container (for the gold coin project that is). I only used a stick (like a shishkabob stick) to carve. Carving is not the easiest if you like your designs neat. You have to go slowly. You can also look at Week 8's clay project (clay medal) for more ideas in working in relief. Let the clay dry for a day or two and then paint. Don't forget to mark each kid's name on the back of the project.

Incan Gold Mask
*tagboard or old cereal boxes (the grey side), yarn, scissors, glue, gold paint
Each child cuts the shape of his mask (teacher can provide templates). Then yarn is cut and glued into place to show the facial features. The next day, after the glue dries, the mask can be painted gold. Note: if you have money in your budget, you could try metal tooling. Check out these beautiful Incan-inspired masks on The Princetonol Website


Pet Gold Nugget
*materials: rocks, gold glitter, glue, other craft supplies such as googly eyes, pipe cleaners, glue, etc. (use up leftover materials from sock puppet)


Poke Pocket
(definition: a small bag, little pouch, that a miner carries gold nuggets & dust in)
younger kids: paper, hole punches, yarn
older kids: felt, needles, embroidery floss, yarn
See 2011 Wild West Week lessons ~ Sewn Satchel (note: I believe the kids did this at camp last year and really enjoyed it)


Week 3 - Mythical Creatures


Drawing monsters
*pencils, erasers, paper
Activity: kids draw mythical creatures and find inspiration from the Dover weekly free sampler (see images above and below). Encourage drawing basic shapes/forms first and adding details and shading/color later. Kids can also draw dragons, unicorns, mermaids, Lochness monsters, etc.


Sock puppets
*socks (time to empty the lost & found!), permanent markers, googly eyes, yarn, buttons, glue and any other craft supplies.
Make a unicorn, an alien or just a silly doll. The younger kids might enjoy putting on a puppet show.


Clay Gargoyles
*materials: air dry clay, cups for water, clay mats, space to dry clay projects, clay tools (tooth picks, clay tools, sticks, popsicle sticks, etc)
Kids form a ball (size of their fist or smaller) and then a pinch pot. Flatten one side gently, this will be the chin. Attach other pieces of clay to add eyes, horns, teeth, etc. With airdry clay you can use a little water to help attached pieces stick (just dab it on with your finger as you don't want to get clay too wet or it turns to mush). You can also carve details such as scales, hair, etc. Add child's name to bottom of piece and paint a day or two later.

For more inspiration: Read Night of the Gargoyles by Eve Bunting


Charcoal Gargoyles
*charcoal (vine charcoal & compressed are ideal but if you only have one- go with compressed), construction paper (light colors or white), optional: Pink Pearl erasers that you are okay with only using for this project
Begin sketching gargoyle with vine charcoal. Vine charcoal is fairly light and can erase easily by just wiping it with hand (it won't erase completely but the "history" is nice to see). Once sketched, then darken features with compressed charcoal. You can use your finger to rub in areas. The erasers can lighten areas that you have added charcoal too (see highlights in my eyebrows). Don't think of it as erasing but more bringing out lighter areas, a reverse way of creating shapes. Be prepared for a mess, ready to wash hands and have sponges and towels on hand to clean and dry tables. This is worth the mess as the kids really get into this material.