Showing posts with label Textiles. Show all posts

Saturday, June 7, 2014

Ohlone Basket Weaving


K-5 artists are studying Ohlone basket weaving. The Ohlones are master basket weavers and Encinal students are learning more about the People, plant biology & native plants, and basket weaving using natural (willow shoots, sedge & bracken fern roots) and synthetic materials. Ask your student what a spoke is, how the Ohlone cooked in wooden baskets and if their baskets really could hold water. Mrs. Noon hopes to pass on the Ohlone’s respect for nature and native plants, beauty in form and function, attention to detail and resourcefulness through this unit. Find out more about California basket making here: California Parks- information on Indian Basketry. Did you know a traditional Ohlone basket takes almost 3,000 hours to weave and could use 20,000 stitches? Our baskets are taking 2-4 art classes. We couldn’t think of a better activity to do while we wait for the willow to grow! Students have really enjoyed learning about this art form, reading selections from The Ohlone Way by Malcom Margolin (young adult/high school age appropriate book in it's entirety) and learning about local artist...

...Linda Yamane, Ohlone basket weaver.
Ms. Yamane, a Rumsien Ohlone from the Monterey Bay area, is almost single-handedly preserving traditional Ohlone basket making. She also is working hard to preserve the language of her people. To learn more about Ms. Yamane and California basket weaving, click on the links below.  
Basketmaking links:


***Spark! video on Julia Parker's basket weaving & Pomo legacy*** (a great video) 

California Indian Baskets - State Park website  

Video - Life in the Arts, Linda Yamane  

First few chapters of Margolin's 'The Ohlone Way' 


Andrew's basket, 4th grade                                                                                                                  Helena's basket, 3rd


Friday, May 25, 2012

Week 13- keeW sdrawkcaB


Tie-Dye Camp T-Shirts
*Jacquard dyes & kit, squeeze bottles, white t-shirts, lots of rubberbands (I like the thicker ones), gloves (note: check for latex allergies, can use Nitrile gloves instead), water source: hose or sink, gallon ziploc bags for wet shirts
Laura is the tie-dye shirt expert! Stephanie's tips are: for the most vibrant colors, prewash shirts and read manufacturer's instructions. Show the designs that can be created using the handout (spirals, circles, etc.). Help younger kids with the rubberbands, you want them really tight since it's a resist technique. The rubberbands keep the dye off the shirt. Review how colors mix (color wheel is helpful). Red & Yellow=Orange, Blue & Yellow=Green, Blue & Red=Purple. If not cutting rubberbands off the shirts and rinsing them at camp, then send shirts home in sealed ziploc bags with child's name on bag and rinsing/washing directions attached.
Have fun!!!

Salvador Dali surreal magazine collage
*magazines (any kind but National Geographics are great for backgrounds), 9x12 & 12x18 white paper, glue, scissors, 1 gallon ziploc bag per child (to save cut images while in process).
View "Get Surreal" video and Dragon in my Art Room Blog (Dali lessons). ~OR~ show students "The Persistence of Memory" by Salvador Dali. Asks students what they see in it, what they like and what's interesting. Surreal art is dreamlike yet realistically rendered. Students need to use at least one element of surrealism in their collage: dislocation (putting something in an unusual location), juxtaposition (placing 2 objects near each other that are not normally found together), metamorphosis (changing one object into another object), and symbolism (an object resprenting an idea). Students need to find a large background image and also cut smaller images to juxtapose, dislocate, etc. Careful cutting is a must. Students are asked to discard inappropriate magazine images (violent images, alcohol, too much skin, etc.). The more strange and unusual the better!


da Vinci sketchbooks, backwards writing
*pencil, paper, imagination!
Inspiration: Discuss the life of Leonardo da Vinci (1452-1519, Italian). da Vinci was a painter (Mona Lisa), sculptor, inventor, architect, engineer...a true Renaissance man. Above is his sketch for a spinning wheel from his sketchbooks. da Vinci cryptically wrote backwards in his sketchbooks and filled them with sketches from nature, anatomy and inventions. See more inventions at da-vinci-biography.com.
Activity: Students will create an invention and label the parts. For a challenge they can try writing backwards. Test the writing by viewing it in a mirror.


Monday, May 21, 2012

Week 5- Heroes


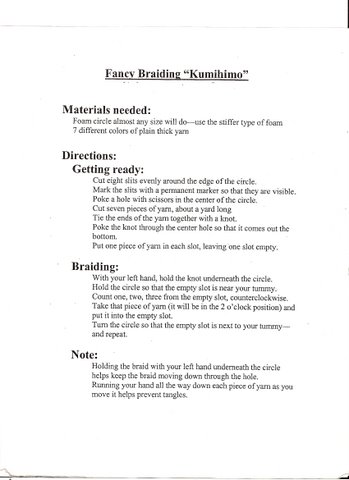
Red, white, & blue Japanese braided bracelet
*6" cardboard cake circles (I ordered online at webstaurantstore.com), prep circles with 8- 1/2" cuts all the way around edge of circle (older kids can do this) and poke a hole in center with scissors (careful!), red, white & blue yarn (kids measure 2 arms lengths and need 7 pieces cut), pencils to label cake circle and help poke yarn through the hole (note- you'll need to prep this for younger kids but older kids can put yarn  on the loom themselves with guidance)
See lesson plan below:


Red, White & Blue Tree Whisperer paper tree
*various papers and tools to decorate, draw and write poetry, string, hole punch
http://treewhispers.com/
Take a moment to view this website and I promise you will be very inspired!


Paper beaded necklaces
*paper (old magazines, junk mail), rulers, pencils to draw, scissors, glue, straw/shishkabob stick/old pencil to roll bead onto, thin yarn, pony beads- optional
note: this project falls under "heroes" section because the people involved in the various projects help make life better for others around the world. These groups are Beadforlife.org, metowe.com (see keynote Spencer West who visits Bay Area and "Mamas necklaces")
     See bead information from Ugandan paper bead rolling

Saturday, February 11, 2012

Weaving trick


I can't believe I've been teaching this lesson for 11 years and only now did this trick come about. A thoughtful parent volunteer slid paper under the center of the loom while the kids were weaving their designs (such as squares and rectangles). It's so smart! Wonderful trick!!!

Monday, November 7, 2011

Ugandan Art Ideas


Soap Carved Mask:
Just finished my first ever soap carving- how did I escape childhood without doing this? This is a possible craft for our school's Cultural Arts Day on Uganda in 2012. With 30-45 minutes, the kids may need to finish at home if they are perfectionists like their art teacher.
*Tools: plastic knife, chopstick, toothpick and popsicle sticks.
Remember to look at all sides while carving. Be prepared- soap dust everywhere! At the end, kids will need to wash hands with water only.

2D African Mask:
The 4th & 5th graders are drawing African masks with oil pastel & pastel right now in art class (see above sample and directions below). We will watch a video of a mask dance/rite from Western Africa http://www.sorosoro.org/en/the-mukuji-rite-with-the-punu-from-gabon


**ADDENDUM ON MASKS: we learned during our African studies that masks are more Western African than Eastern. Thank you to Francis, Ed, Elizabeth and company for all your great work on Cultural Arts Day!

Batik with spray bottle:  Another idea for a craft rotation.
*Tools: white crayon or candle, paper, diluted paint in spray bottle (I used tempera), paper towels
Kids draw designs, adult teaches proper "spray bottle techniques" (quick, open & close motion~ not slow and incomplete pull). Each kid gets up to 4 sprays, then wipes off extra "dye" with a paper towel. A new, double-folded school paper towel is placed around batik like a folder to get home safely.
Beaded Necklaces:  
Tools: recycled glossy mailings (campaign mailings, Bed Bath & Beyond Coupons, etc), scissors, glue, old pencils, string, pony beads
Kids will make necklaces in art class before CAD, to be worn the day of.
http://www.beadforlife.org/video/4DVDRoll.html


Tuesday, July 19, 2011

Felt Board in Play Kitchen


We just bought Eliana a play kitchen that we hope will provide years of creative play. I hung some felt behind it (using grommets) and then cut out some food items out of other colored felt. Eliana knew just what to do with it right away. Now she's always bringing us presents of food that she's collected and rearranged. I had a felt board up for awhile in my K-5 art room and the kids were always amazed. "How does it stick?!!"

Sunday, June 12, 2011

Week 9, August 1, Go Green Week


Extra project: Flip Flops from cereal boxes
*empty cereal boxes, scissors, pencils, masking tape
Note: kids can make flip flops throughout the week. The Louise Nevelson project listed below will allow for extra time for other projects (example- gluing base will only take 15 minutes).
Instructions: Cut open empty cereal box and trace both feet. Cut out tracing. Cut and attach any number and widths of straps. Tape straps to base of foot. Best for indoor use. 

Week 7, July 18, Pirate Week Art Lessons


1A: Folded Paper Hats
*newspaper, scissors, scotch tape, materials to decorate

Written Paper Hat directions


Video & Written Paper Hat directions

Most newspapers need to be cut a bit to create the paper hat. A full 2 page spread will need to be cut to 18" in length (with the fold centered in the  middle at 9") This will yield a larger hat. A smaller hat can be created from the Real Estate or Entertainment sections with a little trimming. A smaller hat can also be created from the top section of a 2 page spread~ just cut most of the bottom part off of the spread and open up one of the bottom folds by cutting.

Wednesday, June 8, 2011

Week 4, June 27, Wild West Week


1A, 1B - Draw horses.
*materials: paper, pencils, crayons
See handout on drawing horses. Kids first warm up by standing at table, drawing large ovals with pencil on the back of their paper. Encourage moving their arm from their shoulder in big, loose movements- draw lightly- keep the movement fluid. Pencil moves around and around. Try thinner ovals- first vertically, then horizontally (almost creating rings on a planet). Let the oval become smaller.