Showing posts with label Cut and Glue. Show all posts

Friday, May 25, 2012

Week 13- keeW sdrawkcaB


Tie-Dye Camp T-Shirts
*Jacquard dyes & kit, squeeze bottles, white t-shirts, lots of rubberbands (I like the thicker ones), gloves (note: check for latex allergies, can use Nitrile gloves instead), water source: hose or sink, gallon ziploc bags for wet shirts
Laura is the tie-dye shirt expert! Stephanie's tips are: for the most vibrant colors, prewash shirts and read manufacturer's instructions. Show the designs that can be created using the handout (spirals, circles, etc.). Help younger kids with the rubberbands, you want them really tight since it's a resist technique. The rubberbands keep the dye off the shirt. Review how colors mix (color wheel is helpful). Red & Yellow=Orange, Blue & Yellow=Green, Blue & Red=Purple. If not cutting rubberbands off the shirts and rinsing them at camp, then send shirts home in sealed ziploc bags with child's name on bag and rinsing/washing directions attached.
Have fun!!!

Salvador Dali surreal magazine collage
*magazines (any kind but National Geographics are great for backgrounds), 9x12 & 12x18 white paper, glue, scissors, 1 gallon ziploc bag per child (to save cut images while in process).
View "Get Surreal" video and Dragon in my Art Room Blog (Dali lessons). ~OR~ show students "The Persistence of Memory" by Salvador Dali. Asks students what they see in it, what they like and what's interesting. Surreal art is dreamlike yet realistically rendered. Students need to use at least one element of surrealism in their collage: dislocation (putting something in an unusual location), juxtaposition (placing 2 objects near each other that are not normally found together), metamorphosis (changing one object into another object), and symbolism (an object resprenting an idea). Students need to find a large background image and also cut smaller images to juxtapose, dislocate, etc. Careful cutting is a must. Students are asked to discard inappropriate magazine images (violent images, alcohol, too much skin, etc.). The more strange and unusual the better!


da Vinci sketchbooks, backwards writing
*pencil, paper, imagination!
Inspiration: Discuss the life of Leonardo da Vinci (1452-1519, Italian). da Vinci was a painter (Mona Lisa), sculptor, inventor, architect, engineer...a true Renaissance man. Above is his sketch for a spinning wheel from his sketchbooks. da Vinci cryptically wrote backwards in his sketchbooks and filled them with sketches from nature, anatomy and inventions. See more inventions at da-vinci-biography.com.
Activity: Students will create an invention and label the parts. For a challenge they can try writing backwards. Test the writing by viewing it in a mirror.


Week 12- Under the Big Top


Drawing Animals
*paper, pencil, crayons
Follow these simple directions and draw some African animals. Easy enough for a 5 year old! Great self-esteem booster since these turn out so successful.


Drawing Giraffes
*12"x18" paper, pencil, markers (optional: scrap green paper, coffee sleeves, green crayons, scissors, glue)
Show students photographs of giraffes. Notice their spots, horns, long necks...They can draw one big giraffe, a mom with a baby or many giraffes.
-Step 1: Draw a triangle-shaped head and a long neck. Here's a trick with the neck: make the lines slightly come apart near the bottom to show perspective (giraffe will appear even taller). Then add details to the face- draw a line at the bottom of face to show the nose and then draw a stripe down the center of the face (stripe shows the shape of the face). Draw eyes, ears, and horns. Finally draw the spots, which are not perfect circles, and can be drawn on the edge of the neck (and not always centered).
-Step 2: Color with marker. Show kids how some colors contrast with one another. Great choices are complementary colors (opposite colors) such as red/green, yellow/purple, orange/blue. Light and dark colors are also great choices. Demonstrate neat coloring with markers by outlining first and no scribbling.
-Step 3: Cut out dark and light green paper leaves. Using side of green crayons, color coffee sleeves and cut out leaves. Overlap leaves and glue.


Origami Dog
*Square paper (2 per student), crayons, scissors
Motivation: Read Olivia Saves the Circus. In it she's a dog trainer (not a very good one), a tattoed lady, a lion tamer, trapeze artist. A cute book for the younger kids with simple drawings.
Head: Fold paper in half to form a triangle (open point side down). Fold ears up or down. Fold nose.
Body: Fold paper in half to form a triangle (open edge down, 90 degree triangle). Optional: cut out a space to show negative space between legs. Fold tail behind.
Decorate: Add details to face and body with crayons. Some kids use other paper to make leashes, dog bones, bowls, etc.


Clay Oaxacan animals
*Crayola air dry clay (1/8 of a disc of clay- yielding 16 wedges in a container), water, tools (toothpicks, popsicle sticks), paints, brushes (#3 tiny Crayola brush)
Form animal's body and head (if neccesary) by making a ball or cubish shape(s). Pull legs out gently (or attach legs by rolling a thick coil and putting a little water on joint with finger). Do not make legs and tails too skinny and long or they will break off. Note: above lizard sample is from Oaxaca, Mexico and is made out of wood. Frog is made out of clay and tempera paint. Pinch ears out (if necessary), add little balls for eyes or depress eyes and nostrils with pinky finger. Lastly, carve details. Let clay dry for a day or two and paint. Oaxacan sculptures use a lot of pattern the back of a brush is perfect for adding details.

Week 10- It's a Mystery


da Vinci's inventions
*pencil, paper, imagination!
Inspiration: Discuss the life of Leonardo da Vinci (1452-1519, Italian). da Vinci was a painter (Mona Lisa), sculptor, inventor, architect, engineer...a true Renaissance man. Above is his sketch for a spinning wheel from his sketchbooks. da Vinci cryptically wrote backwards in his sketchbooks and filled them with sketches from nature, anatomy and inventions. See more inventions at da-vinci-biography.com.
Activity: Students will create an invention and label the parts. For a challenge they can try writing backwards. Test the writing by viewing it in a mirror.


Salvador Dali surreal magazine collage
*magazines (any kind but National Geographic is great for backgrounds), 9x12 & 12x18 white paper, glue, scissors, 1 gallon Ziploc bag per child (to save cut images while in process).
View "Get Surreal" video and Dragon in my Art Room Blog (Dali lessons). ~OR~ show students "The Persistence of Memory" by Salvador Dali. Asks students what they see in it, what they like and what's interesting. Surreal art is dreamlike yet realistically rendered. Students need to use at least one element of surrealism in their collage: dislocation (putting something in an unusual location), juxtaposition (placing 2 objects near each other that are not normally found together), metamorphosis (changing one object into another object), and symbolism (an object representing an idea). Students need to find a large background image and also cut smaller images to juxtapose, dislocate, etc. Careful cutting is a must. Students are asked to discard inappropriate magazine images (violent images, alcohol, too much skin, etc.). The more strange and unusual the better!


Lunch Bag Kit (repeat from Week 1)
*lunch bag per student filled with assortment of items such as paper clip, gum, popsicle sticks, pipe cleaner, etc.)
Each child needs to create something creative out of their "mystery bag". This is a great way to use up old craft supplies! For a challenge, teacher can require that everyone must use EVERYTHING out of their lunch bag.


Wednesday, May 23, 2012

Week 7- Wet 'N Wild

Koinoibori (Japanese Carp Kites)
*materials: paper, markers or crayons, stapler, crepe paper, yarn, scissors
Activity: see lesson plan link and Carp Kite lesson plan
Background: Families in Japan display Koinobori (carp kites) on May 5, Children's Day, a national holiday represents strength and health in children (Japanese carp/koi are very hearty fish, who can swim upstream). The sizes and colors of the koi symbolize the members, age and gender of the family members. View the well known song about the Koinoibori on Youtube, (the last 20 seconds is an ad for learning Japanese). Thanks to Heidi Y. for the great resources!


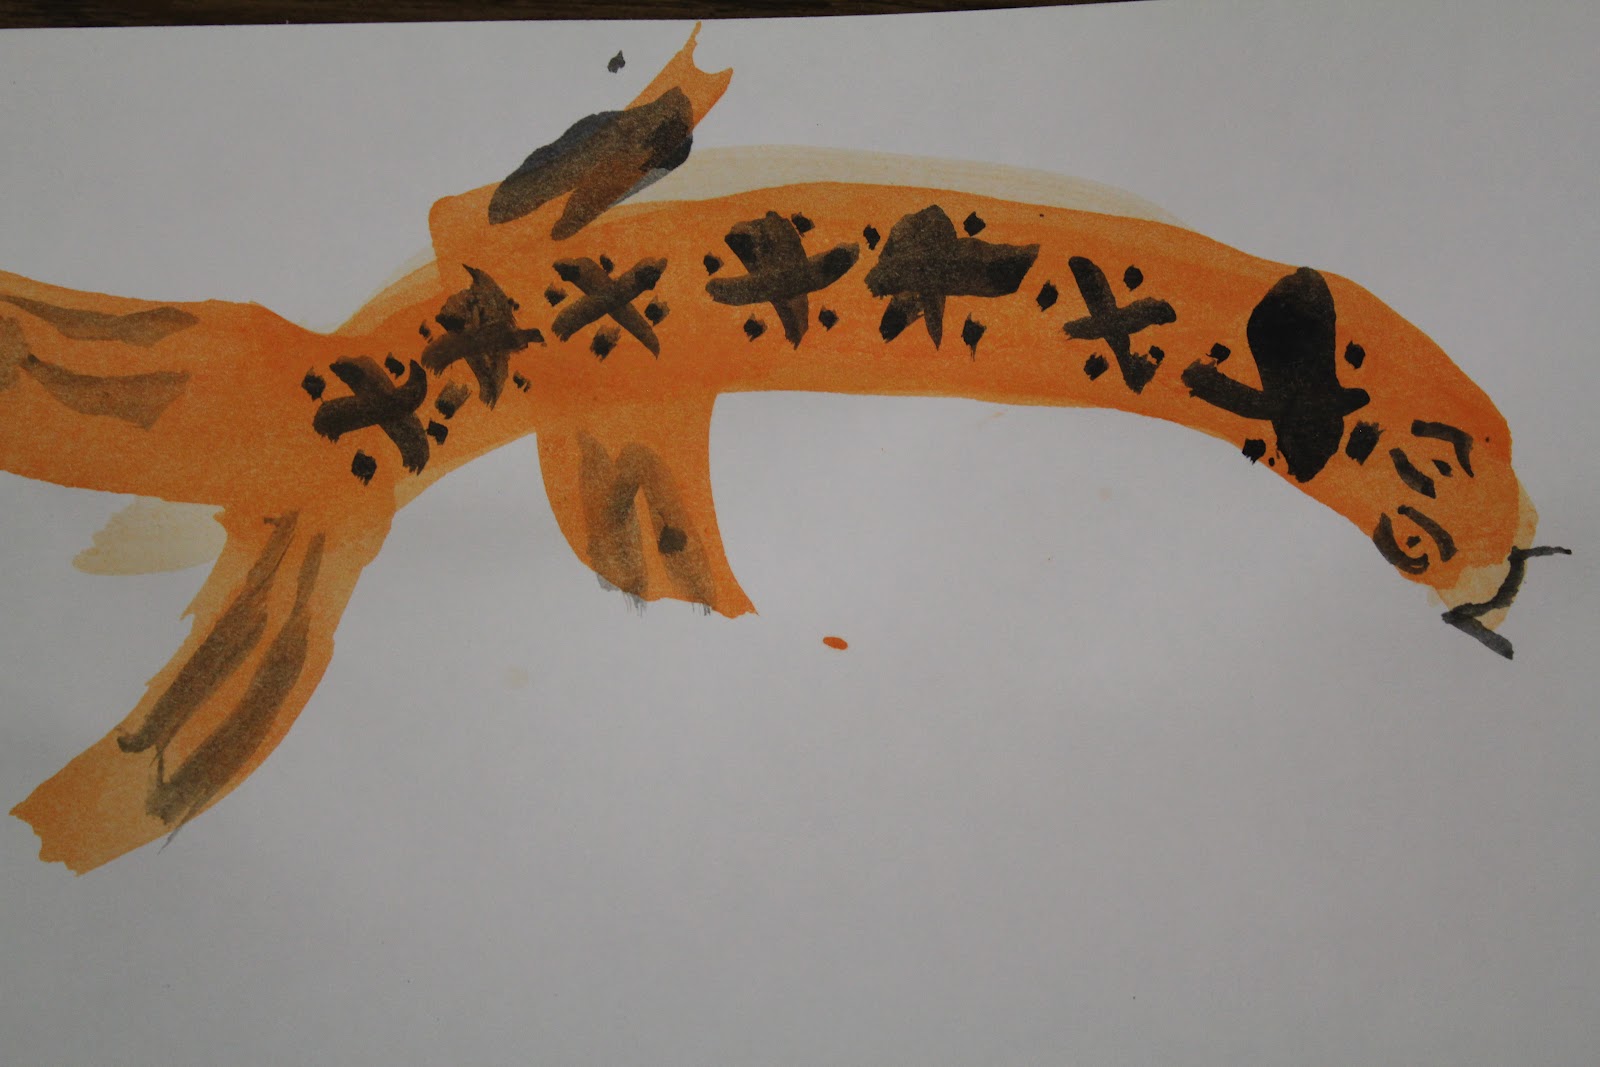
Koi painting by Stephanie


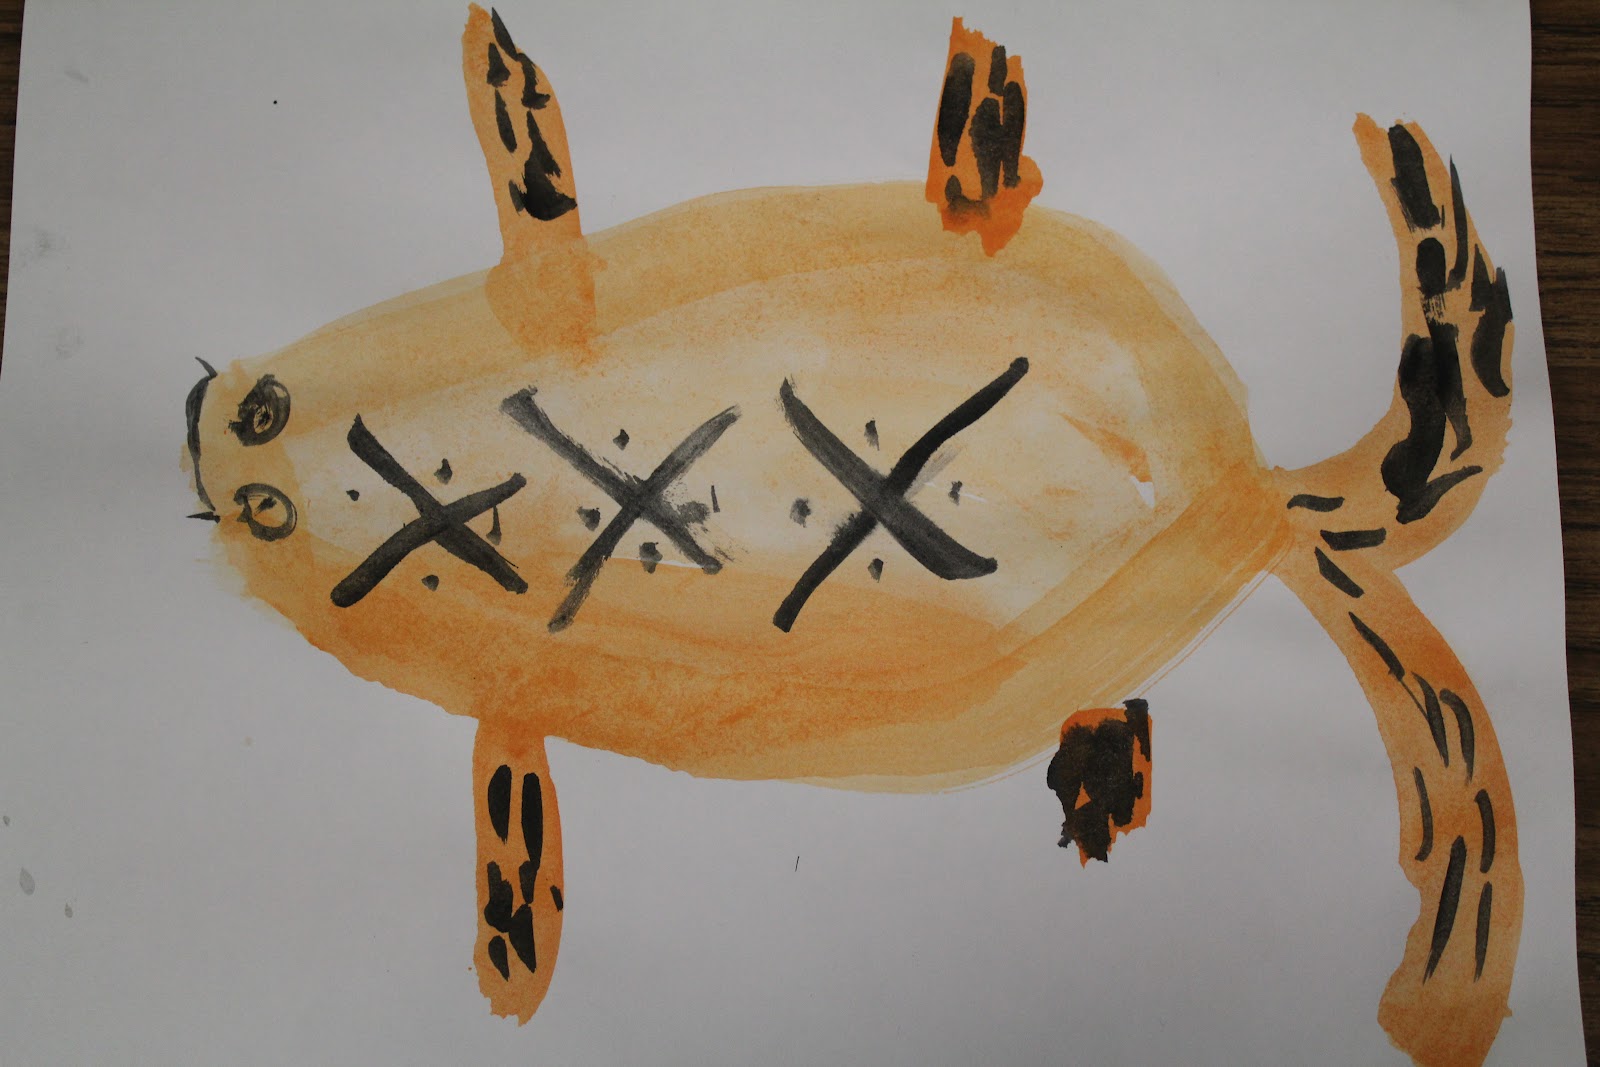
Above paintings by Kindergartners: Jack (top left), Sasha (top right), Scott (middle),
Lucas R. (bottom left), Ian (bottom right)

Japanese Koi watercolor paintings
*watercolor paints or tempera cakes, 3/4" big brushes & #3 tiny brushes, water jars, water, paper, (optional: crayons, should you choose to draw first and not teach "true" Chinese Brush Painting)
For this lesson, you introduce Chinese Brush Painting. This is an ancient method of painting based on yin and yang principals (everything in balance and harmony~ even the black ink against white paper). This style of painting takes years to master but can be very zen-like. There is no drawing before a painting is begun. Basic brush strokes are practiced first. If you want a thick brush stroke, you press down heavy on the brush. To make the brush stroke thinner, you only let the tip of the brush touch the paper. Teach students how to hold the brush (either in the center of brush handle or near the "ferrule"/part just above bristles for more detailed brushstrokes). Encourage good posture while sitting or even standing. Fluid motions are necessary along with practice, practice, practice. It helps to start on newsprint which seems less precious than white paper. Try thin, thick, vertical, horizontal, straight, curvy, long and short lines. Add more water to lighten colors and less water to darken. After practicing brush strokes, introduce the koi painting.

Show students the process step by step (body and fins first, save texture and details in face until later when paint dries a bit). Do not draw first. Plan ahead and think before you make a brushstroke. The kindergartners painted the body with 3 curved brushstrokes (tail to head). For each stroke they added a little water to their brush to make each stroke a little lighter than the last. The fins were painted just by making flicks. The tail can be 2 big brush strokes or many curvy strokes to show motion and the fan-like look. Finally add details with black and use a tiny #3 brush. You may have to dry the body of the fish a bit with a paper towel so the black doesn't bleed into the orange. Paint eyes (not in one motion but a few curved lines), whiskers, mouth, X's and dots to show texture on the body, and lines in the fins to show texture.

Tip: to get a multi-colored brushstroke you can put one color on the brush (example=orange) and then dip the tip in another color (like black in the top painting).

Another option is to have the kids draw the fish first in pencil and then outline in crayon. A beautiful painting can still be achieved although this does not teach the principals of Chinese Brush Painting.


Note: we used the Prang Tempera cakes and 3/4" big brush & #3 tiny brush for the Koi painting.
I love these paints and they last forever (think years).


Spray Bottles
see week 1, Mad Scientist Week


Monday, May 21, 2012

Week 5- Heroes


Red, white, & blue Japanese braided bracelet
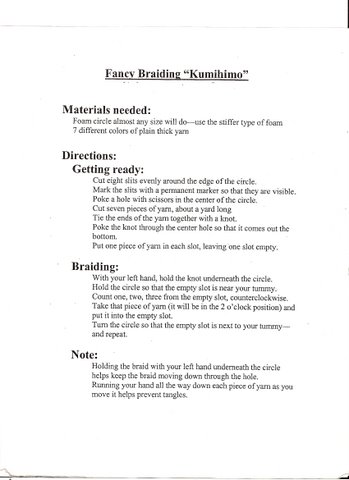
*6" cardboard cake circles (I ordered online at webstaurantstore.com), prep circles with 8- 1/2" cuts all the way around edge of circle (older kids can do this) and poke a hole in center with scissors (careful!), red, white & blue yarn (kids measure 2 arms lengths and need 7 pieces cut), pencils to label cake circle and help poke yarn through the hole (note- you'll need to prep this for younger kids but older kids can put yarn  on the loom themselves with guidance)
See lesson plan below:


Red, White & Blue Tree Whisperer paper tree
*various papers and tools to decorate, draw and write poetry, string, hole punch
http://treewhispers.com/
Take a moment to view this website and I promise you will be very inspired!


Paper beaded necklaces
*paper (old magazines, junk mail), rulers, pencils to draw, scissors, glue, straw/shishkabob stick/old pencil to roll bead onto, thin yarn, pony beads- optional
note: this project falls under "heroes" section because the people involved in the various projects help make life better for others around the world. These groups are Beadforlife.org, metowe.com (see keynote Spencer West who visits Bay Area and "Mamas necklaces")
     See bead information from Ugandan paper bead rolling

Week 2- Halloween in June


Masks & Construction Paper Hats
see lesson plan from 2012 camp


Fashion Design
*paper, pencil, colored pencils
View Kathryn Elyse's illustrations (shown above) for inspiration.
Kids design costumes on paper. Encourage exaggeration (longer/ flowier capes, bigger masks, more colorful feathers, etc.) and drawing the body taller than most people are (to achieve the look of a fashion design drawing). See the information below on head to body proportion from Wikipedia.
"The proportions used in figure drawing are:
  • An average person, is generally 7-and-a-half heads tall (including the head).
  • An ideal figure, used when aiming for an impression of nobility or grace, is drawn at 8 heads tall.
  • A heroic figure, used in the heroic for the depiction of gods and superheroes, is eight-and-a-half heads tall. Most of the additional length comes from a bigger chest and longer legs."


Paper Bag Figure
*lunch bags, newspaper, masking tape (any craft items or drawing tools you want to decorate figure with)
See lesson plan, compliments of the Dick Spiersen:


Bob Barner Skeleton Drawings +/or Qtip Skeletons
*Drawing tools of your choice and paper, for inspiration: Read Dem Bones by Bob Barner and play "Dem Bones" song, print skeleton/anatomy handout from EnchantedLearning.com
After reading Dem Bones to the kids, show them how to draw a human skeleton while using the words from the song and book. "The head bones connected to the neck bone..." Younger kids can just draw an oval for the skull while older kids can show the shape of the skull more defined (encourage them to add eyes, mouth, later). One thing I remind them is that you can get caught up in all the rib bones but to save space for the lower half of the body. I like to aim to get the pelvic or "hip bone" in the middle of the paper so I still have room for the leg bone. It is pretty amazing to see Bob Barner, a San Franciscan, draw his skeletons while the song plays. He times it perfectly and the kids are amazed. If the teacher can do the same (after a little practice), the kids will be enthralled and excited to try as well. Finally, it's fun to position the skeleton into different poses. Arms and legs can bend at joints. Hips and shoulders have sockets that allow different positions as well. Why not dress up your skeleton in a "Dia de los Muertos" type of way?


Day of the Dead Skulls
*Crayola Model Magic clay or any air dry clay, tools (like popsicle sticks, toothpicks, etc), markers or paints, beads/gems for eyes if using Model Magic
-Day 1: Students form a ball of clay in their hand. They then gently pull the jaw/chin area down and out and then carve the mouth and nose with the tools. An upside heart makes a good nose. Next they choose 2 beads or gems to press into the eyes. Lastly, they need to rock the bottom of the skull a bit to make it flat (so it won't roll around once dry).
-Day 2: Decorate with markers or paint.

Thursday, July 14, 2011

Blast from the Past: Art projects from Stephanie's Childhood (circa 1980-1996)

Dug out the portfolio box of art projects, from my childhood, that had been hiding in my grandparents' basement. What a fun trip down memory lane. Here are some of my favorites that I will resurrect soon in the art room. Maybe you'll try one with your little one or class too!