Friday, May 25, 2012

Week 13- keeW sdrawkcaB


Tie-Dye Camp T-Shirts
*Jacquard dyes & kit, squeeze bottles, white t-shirts, lots of rubberbands (I like the thicker ones), gloves (note: check for latex allergies, can use Nitrile gloves instead), water source: hose or sink, gallon ziploc bags for wet shirts
Laura is the tie-dye shirt expert! Stephanie's tips are: for the most vibrant colors, prewash shirts and read manufacturer's instructions. Show the designs that can be created using the handout (spirals, circles, etc.). Help younger kids with the rubberbands, you want them really tight since it's a resist technique. The rubberbands keep the dye off the shirt. Review how colors mix (color wheel is helpful). Red & Yellow=Orange, Blue & Yellow=Green, Blue & Red=Purple. If not cutting rubberbands off the shirts and rinsing them at camp, then send shirts home in sealed ziploc bags with child's name on bag and rinsing/washing directions attached.
Have fun!!!

Salvador Dali surreal magazine collage
*magazines (any kind but National Geographics are great for backgrounds), 9x12 & 12x18 white paper, glue, scissors, 1 gallon ziploc bag per child (to save cut images while in process).
View "Get Surreal" video and Dragon in my Art Room Blog (Dali lessons). ~OR~ show students "The Persistence of Memory" by Salvador Dali. Asks students what they see in it, what they like and what's interesting. Surreal art is dreamlike yet realistically rendered. Students need to use at least one element of surrealism in their collage: dislocation (putting something in an unusual location), juxtaposition (placing 2 objects near each other that are not normally found together), metamorphosis (changing one object into another object), and symbolism (an object resprenting an idea). Students need to find a large background image and also cut smaller images to juxtapose, dislocate, etc. Careful cutting is a must. Students are asked to discard inappropriate magazine images (violent images, alcohol, too much skin, etc.). The more strange and unusual the better!


da Vinci sketchbooks, backwards writing
*pencil, paper, imagination!
Inspiration: Discuss the life of Leonardo da Vinci (1452-1519, Italian). da Vinci was a painter (Mona Lisa), sculptor, inventor, architect, engineer...a true Renaissance man. Above is his sketch for a spinning wheel from his sketchbooks. da Vinci cryptically wrote backwards in his sketchbooks and filled them with sketches from nature, anatomy and inventions. See more inventions at da-vinci-biography.com.
Activity: Students will create an invention and label the parts. For a challenge they can try writing backwards. Test the writing by viewing it in a mirror.


Week 12- Under the Big Top


Drawing Animals
*paper, pencil, crayons
Follow these simple directions and draw some African animals. Easy enough for a 5 year old! Great self-esteem booster since these turn out so successful.


Drawing Giraffes
*12"x18" paper, pencil, markers (optional: scrap green paper, coffee sleeves, green crayons, scissors, glue)
Show students photographs of giraffes. Notice their spots, horns, long necks...They can draw one big giraffe, a mom with a baby or many giraffes.
-Step 1: Draw a triangle-shaped head and a long neck. Here's a trick with the neck: make the lines slightly come apart near the bottom to show perspective (giraffe will appear even taller). Then add details to the face- draw a line at the bottom of face to show the nose and then draw a stripe down the center of the face (stripe shows the shape of the face). Draw eyes, ears, and horns. Finally draw the spots, which are not perfect circles, and can be drawn on the edge of the neck (and not always centered).
-Step 2: Color with marker. Show kids how some colors contrast with one another. Great choices are complementary colors (opposite colors) such as red/green, yellow/purple, orange/blue. Light and dark colors are also great choices. Demonstrate neat coloring with markers by outlining first and no scribbling.
-Step 3: Cut out dark and light green paper leaves. Using side of green crayons, color coffee sleeves and cut out leaves. Overlap leaves and glue.


Origami Dog
*Square paper (2 per student), crayons, scissors
Motivation: Read Olivia Saves the Circus. In it she's a dog trainer (not a very good one), a tattoed lady, a lion tamer, trapeze artist. A cute book for the younger kids with simple drawings.
Head: Fold paper in half to form a triangle (open point side down). Fold ears up or down. Fold nose.
Body: Fold paper in half to form a triangle (open edge down, 90 degree triangle). Optional: cut out a space to show negative space between legs. Fold tail behind.
Decorate: Add details to face and body with crayons. Some kids use other paper to make leashes, dog bones, bowls, etc.


Clay Oaxacan animals
*Crayola air dry clay (1/8 of a disc of clay- yielding 16 wedges in a container), water, tools (toothpicks, popsicle sticks), paints, brushes (#3 tiny Crayola brush)
Form animal's body and head (if neccesary) by making a ball or cubish shape(s). Pull legs out gently (or attach legs by rolling a thick coil and putting a little water on joint with finger). Do not make legs and tails too skinny and long or they will break off. Note: above lizard sample is from Oaxaca, Mexico and is made out of wood. Frog is made out of clay and tempera paint. Pinch ears out (if necessary), add little balls for eyes or depress eyes and nostrils with pinky finger. Lastly, carve details. Let clay dry for a day or two and paint. Oaxacan sculptures use a lot of pattern the back of a brush is perfect for adding details.

Week 11- Go Green!


Rolled Paper Beaded Necklace:
*recycled glossy mailings and magazines, scissors, Elmer's glue, straws and/or shishkabob sticks, string, pony beads
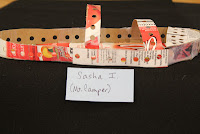
Each bead starts off as an isosceles triangle, cut from junk mail or old magazines. The longer the triangle, the thicker the bead. The wider the base of the triangle, the longer the bead. A little glue and a little patience is then all it takes to form a lovely, biconal bead. Space paper beads with 1 or 2 pony beads and string into a necklace. A beautiful, recycled piece of art is formed!

Inspiration: Women in Uganda make these exact types of beads and beaded jewelry. The only difference is they seal the beads to make them waterproof and they make hundreds of beads. The sales of these necklaces help the women and their families have a better life. Many women invest the money they earn and start their own businesses, in many fields, after their 18-month training with BeadforLife. Check out the necklaces at beadforlife.org This is a great project for kids and adults with a wonderful community and global connection.  

**2022 update: Bead for Life retail store is now closed but the mission continues with Street Business School. What is Street Business School? 
"Street Business School is a world-class entrepreneurial training program that builds women’s confidence and provides business skills, so they can launch micro-businesses and lift their families from deep poverty." (source: https://www.beadforlife.org/)


_______________________________________________


Cereal box Shoes
*empty cereal boxes, scissors, pencils, tape
Cut open empty cereal box and trace both feet. Cut out tracing. Cut and attach any number and widths of straps. Tape straps to base of foot. Best for indoor use.
Note: this lesson was done at 2011 camp.
Alternative: create a wallet out of cardboard

-------------------------------------------------------------------------------------------


Toilet Paper Tube Dolls (Soft Sculpture)
*1 toilet paper tube/child, 5"x14" muslin fabric, thin rubber bands, batting (small ball per child), markers, glue, scissors, other craft supplies to decorate (buttons, scrap fabric, pipe cleaners, yarn) - note: felt is very easy for kids to cut
Inspiration: Faith Ringgold (American Artist, born 1930). Ringgold’s family was very artistic. Her mother was a fashion designer and dressmaker. Her grandmother learned how to quilt from her great-great grandmother and passed this tradition down. Ringgold took these family traditions and created "story quilts" (see books like "Tar Beach") and sculptures that were soft. Sculptures are 3-dimensional, not 2-D or flat. The book Talking to Faith Ringgold is very inspirational.

*Step 1 – take batting (used inside quilts) and put into top of tube (to shape the head) 
*Step 2- place fabric over tube
*Step 3- place rubber band around doll’s head (I show them how to do this step by step- place over head, not tight enough, twist, OPEN, place over head one more time)
*Step 4- smooth the fabric and “fluff” the head if you need to (take a marker and push up from inside, pull up on fabric & batting too)
*Step 5- write name on bottom/outside of tube with with markers
*Step 6- color doll (face, clothes) and add other craft supplies (buttons as eyes or a pendent on necklace, yarn for hair/make a pom-pon, pipe cleaners as arms). Note- I tucked the fabric and pipe cleaner under the rubber bands, no need to glue.

Week 10- It's a Mystery


da Vinci's inventions
*pencil, paper, imagination!
Inspiration: Discuss the life of Leonardo da Vinci (1452-1519, Italian). da Vinci was a painter (Mona Lisa), sculptor, inventor, architect, engineer...a true Renaissance man. Above is his sketch for a spinning wheel from his sketchbooks. da Vinci cryptically wrote backwards in his sketchbooks and filled them with sketches from nature, anatomy and inventions. See more inventions at da-vinci-biography.com.
Activity: Students will create an invention and label the parts. For a challenge they can try writing backwards. Test the writing by viewing it in a mirror.


Salvador Dali surreal magazine collage
*magazines (any kind but National Geographic is great for backgrounds), 9x12 & 12x18 white paper, glue, scissors, 1 gallon Ziploc bag per child (to save cut images while in process).
View "Get Surreal" video and Dragon in my Art Room Blog (Dali lessons). ~OR~ show students "The Persistence of Memory" by Salvador Dali. Asks students what they see in it, what they like and what's interesting. Surreal art is dreamlike yet realistically rendered. Students need to use at least one element of surrealism in their collage: dislocation (putting something in an unusual location), juxtaposition (placing 2 objects near each other that are not normally found together), metamorphosis (changing one object into another object), and symbolism (an object representing an idea). Students need to find a large background image and also cut smaller images to juxtapose, dislocate, etc. Careful cutting is a must. Students are asked to discard inappropriate magazine images (violent images, alcohol, too much skin, etc.). The more strange and unusual the better!


Lunch Bag Kit (repeat from Week 1)
*lunch bag per student filled with assortment of items such as paper clip, gum, popsicle sticks, pipe cleaner, etc.)
Each child needs to create something creative out of their "mystery bag". This is a great way to use up old craft supplies! For a challenge, teacher can require that everyone must use EVERYTHING out of their lunch bag.


Week 9- Celebrate SF!


Aerial Perspective/ Skyscraper Drawing (courtesy of Silicon Valley Art Museum)
*pencils, paper, markers
Read Above San Francisco by Nina Gruener & Robert Cameron for inspiration. Children draw 7-9 parallelograms. The parallelograms will become the rooftops of buildings. They then draw vertical lines down from 3 corners of each roof. They can add details like windows, rooftop gardens, the Golden Gate Bridge, etc. Complete by outlining in marker.


Golden Gate Bridge Painting
*cardboard (3"-5" in length & about 1" wide), red paint, paper plates/palettes, 9x12 paper (white or light blue)
Discuss the history of the Golden Gate Bridge (took 4 years to build, completed in 1937, at the time was the longest suspension bridge, connects SF to Marin County). Vocabulary= towers (2), deck (roadway), 4 rectangles cut out of towers above deck, "X" below the deck on tower, diagonal and vertical lines in deck, curved cables, suspenders hang down from curved cables.
~Note: example of cardboard/painting tool is shown in last photograph.
~Examples are from Kindergartners & 3rd graders
Step by step directions:
1. paint 2 towers (no designs) - note each tower can be the same height or one can be shorter to show perspective
2. Paint deck with 2 horizontal lines
3. Add details such as rectangles in upper towers, "X"s on lower towers, lines in deck
4. Place a dot on left corner of each tower (this part lights up at night). Connect with a "U" shaped line by dragging cardboard. Stop in the middle to reposition cardboard. Make dots in right hand corners and connect with another "U".
5. Don't forget to draw cables going off the page from each corner of tower (in opposite direction of the last one)
6. Paint a few suspenders.
7. Add any other details you feel necessary.


3D Paper Sculpture
(inspiration from the slides of SF, curvy Lombard St., & Golden Gate Bridge)
*colored construction paper 9"x12", scissors, scotch tape

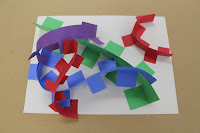
Activity 1 (directly above): Provide or have kids cut 1.5"-2" wide strips of paper (of various lengths). Fold strip of paper lengthwise and then make cuts on only one half of the paper, about 1" apart. Fold each "fringed" piece in opposite directions. Arrange and tape strips of paper onto background paper.


Activity 2 (directly above): Kids make 2 sets of parallel cuts on two different sides of the background paper. They then cut (or teacher can provide strips already cut) colored paper into strips about an inch wide (and about 12" long). The strips of paper are arranged on the background paper, starting by sliding the first two strips under the cuts. The strips can twist and turn, be accordion folded, etc. They are taped down and a whimsical relief sculpture is created. This is a great lesson for kindergartners - 2nd grade.

Week 8- Camp Olympics


Olive Wreath (younger campers)
*green pipe cleaners (2 per child), green construction paper, hole punches, scissors
note: The first Olympic games were held in 776 BC. The olive tree played a crucial role in this event. The Olympic Winners were awarded with a crown woven from olive branches...The first Olympic torch was a burning olive branch. info from Olympic activities website
-Cut leaves (teach kids how they can cut a few at once by folding paper). Punch a hole near the end of each leaf. String leaves onto the pipe cleaners. Cut to size and twist ends together. Proudly wear your new wreath!


Clay Pendant/ Medal
*air dry clay, cookie cutters, clay tools (toothpicks, popsicle sticks), straws (for hole in pendant), red/white/blue ribbon, glue gun (note- hot glue did not keep ribbon connected so I ended up duct taping ribbon to the medal. I have found E6000 Glue glues almost anything but it's an adult only job and takes a day to dry).
See clay instructions, week 4
Alternative: Cardboard Relief Medals similar to the Gold Rush coins (see Week 4 lessons)


Red, White & Blue Bracelets
*red, white and blue yarn (or include embroidery floss for older kids), masking tape or clipboards (possibly pony beads for younger kids)
Repeat Japanese braiding in red, white & blue yarn or make friendship bracelets.
Directions for "4" Friendship bracelet:
Kids cut 2 pieces of yarn, each as long as one arm. Take both pieces and tie an overhand knot. Tape above the knot or clip onto clipboard. Take the left yarn and make a #4. As you pull the knot tight, stretch the yarn on the left up high (hold the yarn on the right down, towards your tummy). Do that twice to make a double knot. Then reverse it. Take the yarn on the righthand side, tie a backwards #4. Pull the right yarn up high. Continue until it’s the desired length.


~For a variation, try 3 strings. You'll need to cross over 2 strings at once, rather than only 1. For the example below (and in it's completed form above, I tied 4 knots rather than 2).
~"Chevron" example (above) not listed here but Stephanie can share lots of friendship bracelet techniques upon request. I love the Klutz book on friendship bracelets!


Variation for younger campers:
Provide yarn and pony beads. They can string the beads onto yarn and create a necklace or bracelet.