Monday, May 21, 2012

Week 4- Gold Rush


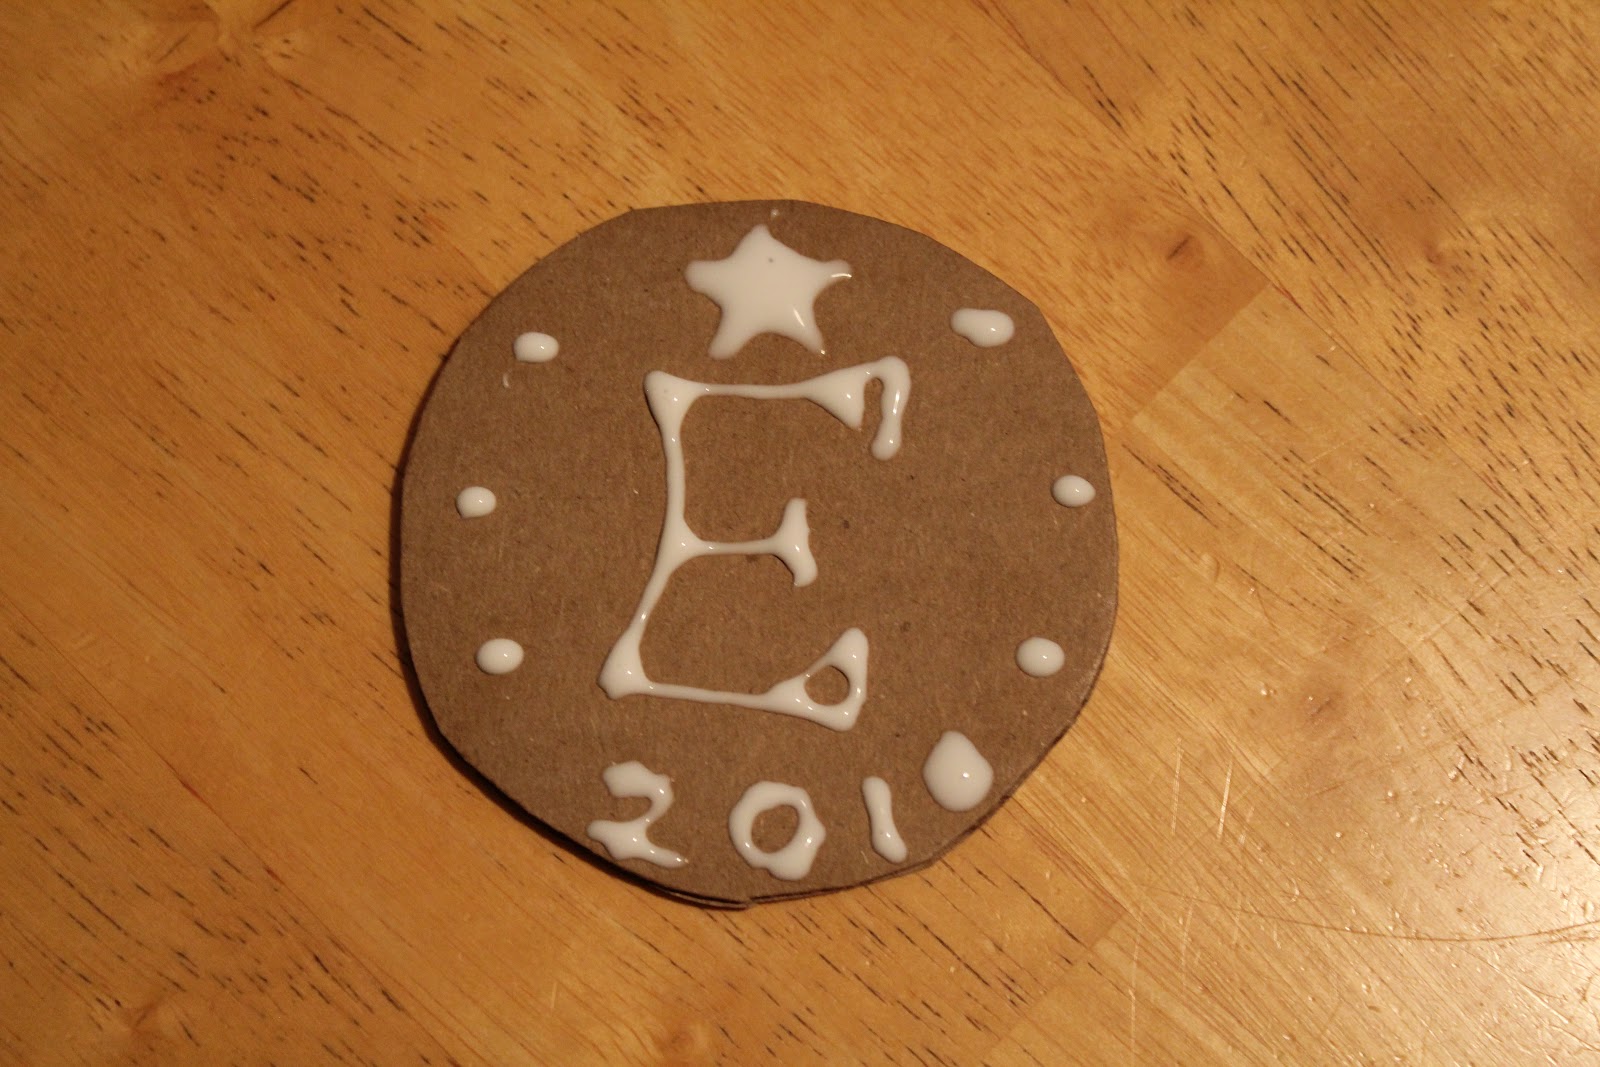
Gold Coin
*cardboard  circles (pre cut for younger kids), glue and/or string, tempera or acrylic gold paint, optional: gold glitter
Each kid designs their coin with glue or with string glued onto cardboard. The next day, after the glue dries, the kids paint the coins gold. Note that acrylic paint can stain :( but dries quickly :) so you could actually paint both sides in one session with the acrylic paint.


Clay coins or Shrinky Dink Coins
*Crayola air dry clay, clay mats, little dishes of water, shishkabob sticks, gold tempera paint

If the clay gargoyles went well, you could make gold coins out of clay instead of cardboard. Or buy some gold permanent markers and create some gold shrinky dink art. Always a camp favorite!

Note: See cutting tips above. I like to use a metal wire cutter. Cut Crayola brand into 2 discs. Then use 1/16 of one of the discs. That will yield 32 pieces of clay from each container (for the gold coin project that is). I only used a stick (like a shishkabob stick) to carve. Carving is not the easiest if you like your designs neat. You have to go slowly. You can also look at Week 8's clay project (clay medal) for more ideas in working in relief. Let the clay dry for a day or two and then paint. Don't forget to mark each kid's name on the back of the project.

Incan Gold Mask
*tagboard or old cereal boxes (the grey side), yarn, scissors, glue, gold paint
Each child cuts the shape of his mask (teacher can provide templates). Then yarn is cut and glued into place to show the facial features. The next day, after the glue dries, the mask can be painted gold. Note: if you have money in your budget, you could try metal tooling. Check out these beautiful Incan-inspired masks on The Princetonol Website


Pet Gold Nugget
*materials: rocks, gold glitter, glue, other craft supplies such as googly eyes, pipe cleaners, glue, etc. (use up leftover materials from sock puppet)


Poke Pocket
(definition: a small bag, little pouch, that a miner carries gold nuggets & dust in)
younger kids: paper, hole punches, yarn
older kids: felt, needles, embroidery floss, yarn
See 2011 Wild West Week lessons ~ Sewn Satchel (note: I believe the kids did this at camp last year and really enjoyed it)


Week 3 - Mythical Creatures


Drawing monsters
*pencils, erasers, paper
Activity: kids draw mythical creatures and find inspiration from the Dover weekly free sampler (see images above and below). Encourage drawing basic shapes/forms first and adding details and shading/color later. Kids can also draw dragons, unicorns, mermaids, Lochness monsters, etc.


Sock puppets
*socks (time to empty the lost & found!), permanent markers, googly eyes, yarn, buttons, glue and any other craft supplies.
Make a unicorn, an alien or just a silly doll. The younger kids might enjoy putting on a puppet show.


Clay Gargoyles
*materials: air dry clay, cups for water, clay mats, space to dry clay projects, clay tools (tooth picks, clay tools, sticks, popsicle sticks, etc)
Kids form a ball (size of their fist or smaller) and then a pinch pot. Flatten one side gently, this will be the chin. Attach other pieces of clay to add eyes, horns, teeth, etc. With airdry clay you can use a little water to help attached pieces stick (just dab it on with your finger as you don't want to get clay too wet or it turns to mush). You can also carve details such as scales, hair, etc. Add child's name to bottom of piece and paint a day or two later.

For more inspiration: Read Night of the Gargoyles by Eve Bunting


Charcoal Gargoyles
*charcoal (vine charcoal & compressed are ideal but if you only have one- go with compressed), construction paper (light colors or white), optional: Pink Pearl erasers that you are okay with only using for this project
Begin sketching gargoyle with vine charcoal. Vine charcoal is fairly light and can erase easily by just wiping it with hand (it won't erase completely but the "history" is nice to see). Once sketched, then darken features with compressed charcoal. You can use your finger to rub in areas. The erasers can lighten areas that you have added charcoal too (see highlights in my eyebrows). Don't think of it as erasing but more bringing out lighter areas, a reverse way of creating shapes. Be prepared for a mess, ready to wash hands and have sponges and towels on hand to clean and dry tables. This is worth the mess as the kids really get into this material.

Week 2- Halloween in June


Masks & Construction Paper Hats
see lesson plan from 2012 camp


Fashion Design
*paper, pencil, colored pencils
View Kathryn Elyse's illustrations (shown above) for inspiration.
Kids design costumes on paper. Encourage exaggeration (longer/ flowier capes, bigger masks, more colorful feathers, etc.) and drawing the body taller than most people are (to achieve the look of a fashion design drawing). See the information below on head to body proportion from Wikipedia.
"The proportions used in figure drawing are:
  • An average person, is generally 7-and-a-half heads tall (including the head).
  • An ideal figure, used when aiming for an impression of nobility or grace, is drawn at 8 heads tall.
  • A heroic figure, used in the heroic for the depiction of gods and superheroes, is eight-and-a-half heads tall. Most of the additional length comes from a bigger chest and longer legs."


Paper Bag Figure
*lunch bags, newspaper, masking tape (any craft items or drawing tools you want to decorate figure with)
See lesson plan, compliments of the Dick Spiersen:


Bob Barner Skeleton Drawings +/or Qtip Skeletons
*Drawing tools of your choice and paper, for inspiration: Read Dem Bones by Bob Barner and play "Dem Bones" song, print skeleton/anatomy handout from EnchantedLearning.com
After reading Dem Bones to the kids, show them how to draw a human skeleton while using the words from the song and book. "The head bones connected to the neck bone..." Younger kids can just draw an oval for the skull while older kids can show the shape of the skull more defined (encourage them to add eyes, mouth, later). One thing I remind them is that you can get caught up in all the rib bones but to save space for the lower half of the body. I like to aim to get the pelvic or "hip bone" in the middle of the paper so I still have room for the leg bone. It is pretty amazing to see Bob Barner, a San Franciscan, draw his skeletons while the song plays. He times it perfectly and the kids are amazed. If the teacher can do the same (after a little practice), the kids will be enthralled and excited to try as well. Finally, it's fun to position the skeleton into different poses. Arms and legs can bend at joints. Hips and shoulders have sockets that allow different positions as well. Why not dress up your skeleton in a "Dia de los Muertos" type of way?


Day of the Dead Skulls
*Crayola Model Magic clay or any air dry clay, tools (like popsicle sticks, toothpicks, etc), markers or paints, beads/gems for eyes if using Model Magic
-Day 1: Students form a ball of clay in their hand. They then gently pull the jaw/chin area down and out and then carve the mouth and nose with the tools. An upside heart makes a good nose. Next they choose 2 beads or gems to press into the eyes. Lastly, they need to rock the bottom of the skull a bit to make it flat (so it won't roll around once dry).
-Day 2: Decorate with markers or paint.

Saturday, May 19, 2012

Camp 2012 Week 1~ Mad Scientist Week

'Tis the summer camp planning season! I'm looking forward to some fun summer arts & crafts at Kids Camp. Please let me know what ya'll think of the lessons, including your experience, tips, etc. Note- this is way more lessons than can actually be done in one week of camp, but the theme was inspirational and perhaps some of these projects can be used during other weeks. Mahalo!


Spray Bottle Mural on Butcher Paper
*spray bottles filled with diluted tempera paint (red, yellow, blue), butcher paper, white crayons, tape
First have kids draw with white crayon on the butcher paper (press hard with the crayon). They then spray the bottles on the butcher paper. What happens when primary colors overlap? How does gravity play a role when the paper is on a vertical surface versus a horizontal surface? Why does the paint not stick to the crayon? The wax in the crayon resists the watery paint. Note: I recommend colors that are more saturated than these (less water, more paint).


Scratch Art
*materials: thick crayons, construction paper, stylus to scratch with (sharp tool, shishkabob stick, old dried pen, pin taped to an old pencil), newspaper to keep tables clean
With newspaper on table, cover construction paper with thick blocks of colored crayon. Then color over with black crayon so colors are covered. Tip: apply a thick layer of black, you'll know if it's not enough when you start scratching. You can always add more black if you're not happy with the contrast. Scratch name or other designs into paper. Be prepared to wipe down tables after as black crayon crumbs will be everywhere. "Katie" sample is from Princetonol Art Lessons. "Kids Camp" was made by me (you can see the first round of black, "kids," was not enough so I added more for the "camp" part).


Spin Art
See Week 6 Lessons


Suminagashi
*marbling dyes (see: http://www.dickblick.com/items/01309-1009/?wmcp=google&wmcid=items&wmckw=01309-1009 , Dippety Dye paper (see: Dippety Dye paper), large & shallow tub that paper will fit in (fill halfway with water so paper can float), paintbrush to move ink in water, newspaper/drying rack to lay drying paper on, pencils to mark names
Write name on paper (in corner) or newspaper. Drop a few drops of ink into water in tub (limit kids to 3 colors and just 2-3 drops of each color). Swirl gently with paintbrush. Lay dippety dye paper carefully onto water so it floats. Remove paper and lay to dry on drying rack/newspaper.
Note: Suminagashi is Japanese for "ink floating". This may be one of the oldest forms marbeling, dating back to the 12th century in China and Japan.

Follow up: You can use these papers for many craft projects. Check out the books we made using the colored paper as the cover and the "smoky" as the end papers.

Lunch bag kit
*lunch bag per student filled with assortment of items such as paper clip, gum, popsicle sticks, pipe cleaner, etc.)
Each child needs to create something creative out of the items in their bag. They must use every item in their bag!

Oobleck
*Cornstarch, water, food coloring, paper/plastic bowls (1 per child), little paper cups/ziploc bags to take home mixture if desired
Arts & Crafts? Maybe not. Fun and mad science? Definitely! See more info at Sciencebob.com
(note- blue food dye stains for a day or so, other colors did not)

Paper Pulp Project
* paper shreds, water, paste
See lesson plan at "There's a Dragon in My Art Room" - paper pulp sculptures

Saturday, February 11, 2012

Weaving trick


I can't believe I've been teaching this lesson for 11 years and only now did this trick come about. A thoughtful parent volunteer slid paper under the center of the loom while the kids were weaving their designs (such as squares and rectangles). It's so smart! Wonderful trick!!!

Rolled Paper Beads a Success!


The rolled paper beads the 4th-5th graders (and a few 3rd graders) made for our Cultural Arts Day on the Lake Victoria Region of Africa were amazing! This was a lot of work but it was fun to make something so beautiful out of recycled paper. Each bead started off as an isosceles triangle, cut from junk mail or old magazines. A little glue and a little patience is then all it took to form a lovely, biconal bead. All students at our school wore the necklaces, that were handmade by the 4th-5th graders, on Cultural Art Days. The lovely BeadforLife ladies visited us that day and many families purchased necklaces made in Uganda to wear as well. The excitement was contagious!
Women in Uganda make these exact types of beads and beaded jewelry. The only difference is they seal the beads to make them waterproof and they make hundreds of beads. The sales of these necklaces help the women and their families have a better life. Many women invest the money they earn and start their own businesses, in many fields, after their 18-month training with BeadforLife. Check out the necklaces at beadforlife.org  This is a great project for kids and adults with a wonderful community and global connection.


Photos: necklace created by 3rd grader, Beadforlife bracelets, The Spirit of Uganda dance troop
Posted by Picasa

Saturday, January 21, 2012

Creative Play - art, mentorship and play area design

Connect with Nature through Weaving
The Tinkering Studio @ the Exploratorium


Who doesn't love sand?
I've been so inspired about the benefits of PLAY thanks to my 18 month old daughter and visiting Nueva School to hear Michael G. Thompson, Ph.D. speak. What is play? It's a mental and physical activity not related to survival. Thompson says it's "the spontaneous activity of children", a "signature mammalian behavior". David Elkind says it's "the inborn disposition for learning, curiosity, imagination and fantasy". Is our society losing unscheduled and creative play? Screen time, soccer practice, parents worried about children's safety...all threaten "free, undirected play".  What does this mean? Could it be a link to higher rates of obesity, stress and increased ADHD? Felix Adler says "we need to give children lots of sunshine when they are young. They are going to need it later." Thompson sums his ideas up by saying "play is the sunshine of childhood".

What can I do? In a few years, trust (gulp) my daughter to play on her own without constant supervision. Obviously some safety nets have to be established. Right now, I'd like to infuse some play into my K-5 school through our weekly advisory program. I don't just want to provide more recess but opportunities for kids to explore, be dramatic, role play, build, and create. I'm going to let the students drive. Will they want to work with legos, make handmade paper, build a ship to play in? Older kids will eventually pair up with younger kids so we can have a little mentoring going on. Finally, I must not forget empathy. Employing "design thinking" strategies...the older kids will need to find the need of the younger kids. What does our school lack? What do they want more of? I just need to remember from Thompson that adults don't need to improve on play. I just need to facilitate.

I'm looking forward to my task. Play on!